This post will explain how to install WordPress on Godaddy Hosting. The best way to install WordPress on Godaddy is to manually download the latest worpress zip file from www.wordpress.org. Then upload the contents of the wordpress file to a file folder on Godaddy. If your installation is not working, make sure your Godaddy hosting plan supports .php. You can always check this before you go through all the steps below. These instructions are for a Deluxe Hosting Account. The Economy Hosting Account may have a welcome.html file to edit instead of pointing in the hosted domains in step 8.
- Go to the hosting control center in Godaddy and setup a new MySQL database. You will need the database name, database password, and the hostname later.
- Create a folder within the Godaddy file manager. This new folder you create will hold a single installation of wordpress, or a single site. (you can point many domains to a single site within godaddy) Make sure and change the permissions of this new folder to read and write, uncheck inherit (check your folder and click permissions up top, you don’t have to check reset all children to inherit).
- Download the latest wordpress zip file from www.wordpress.org to your computer.
- Modify the new wordpress file folder so that only the contents are in a zipped file. When you download the original zip file, it will have a wordpress folder in it, then the contents. If you have windows you can just select the contents and then right mouse click and “send to” compressed file. Then move this zip file to a location of your choice (where you can find it when it is time to upload). Upload this zip file to your Godaddy file manager.
- With your file manager “unarchive” the newly uploaded zip file to the new folder you created. Your folder should not have another folder inside called wordpress and more folders inside that one. Only the contents of the original wordpress folder (wp-admin(folder), wp-content(folder), wp-includes(folder), and several .php files) should be in your new folder.
- In the hosting control center in Godaddy, click IIS Management. This will bring you to the virtual folder setup. Create a folder with the “exact” same name as the new folder you created in step 2. Make sure and check Set Application Root. (This is very important!)
- Now you need to go back into the file manager and edit the wp-config-sample file. Either edit with the godaddy editor or download to your computer and edit. There are 4 items to change – ‘database_name_here’, ‘username_here’, ‘password_here’, ‘localhost’ (leave the ‘ ‘). Save and then change the name of the file to wp-config.php and save or upload where the other file was. All this can be done inside of the Godaddy file manager. Check the file, press edit, edit the file, then rename the file.
- Go to the Hosted Domains button and make sure the website is pointing to the folder with the wordpress install.
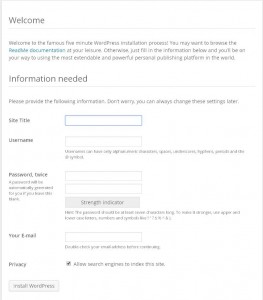
- Once your domain is setup, navigate to the site address and the setup prompts should come up and you can set your username and password for the website.

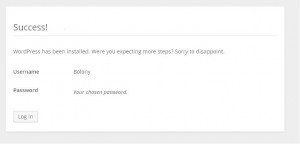
- Fill out the above screen (which means you did it right) – the Site Title is not the site address – it is what you are calling the site. It will automatically put this name places and it can be changed later. the username is for you to log in to the site, then the password is also for the site. The next screen should be the login screen.

- Once you login, you should be at your site now. It is time to edit the site and go on to another topic.

